Hi everyone! I am really excited to share with you some details about my December Daily album and process today :) I absolutely love all things Christmas, so this is a project that is really close to my heart. I have a lot to share, so I have written three separate posts. Part 2 (CLICK HERE) gives you some ideas for photos and stories that you may like to document in your own December Daily album, while Part 3 (CLICK HERE) shows pics of all of the foundation pages that I have completed in my album to date and gives and a little info about my process regarding how I put my December Daily pages together. In today's post (Part 1 of my series), I will share with you some details on how I organize my December Daily album supplies and how you can put together your own December Daily kit. Enjoy :)
As some of you may already know, December Daily is an album concept that was developed by scrapbooker Ali Edwards in order to document and celebrate the month of December in the lead-up to Christmas Day. If you aren't familiar with December Daily, you can find out more about it on Ali’s blog HERE. Ali’s idea has become very popular among scrapbookers the world over, particularly with the introduction of Project Life to the scrapbooking world. The Project Life method of memory-keeping is an awesome way to construct your December Daily album, and as a devoted Project Lifer, it is the format that I am using to construct my first ever December Daily album.
For me, December is a very hectic time full of Christmas goings-on (plus my birthday is on Boxing Day), so I have already started gathering my supplies and constructing my December Daily album. It's only October, I know, but knowing how my life can get busy at a moment's notice, if I don’t get my album put together early, I won’t ever finish it. My plan is to have my album constructed so that, come December, all I have to do is add in the journaling and photos as the month progresses and it’s done. This will really let me enjoy the holiday season all the more and add to the magic and excitement of counting down to Christmas and my birthday...December is certainly my favourite time of year! Here’s some details on the process I have used in constructing my own December Daily kit. Enjoy :)
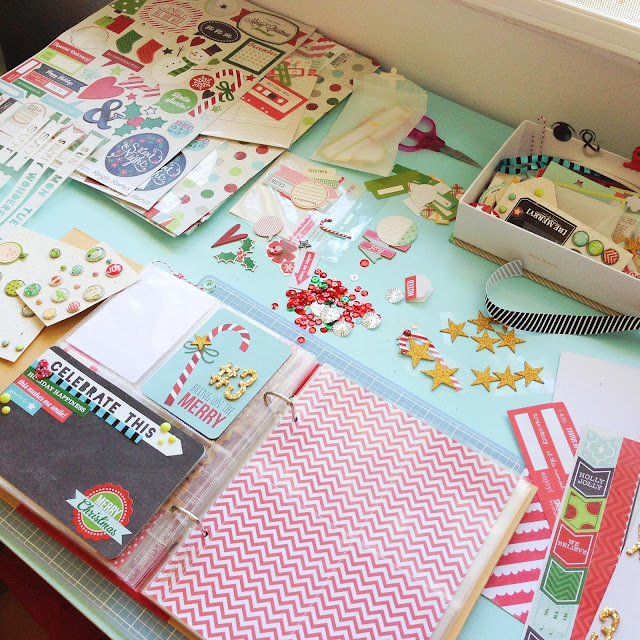
I already had on hand this cute little red and kraft-coloured 6x8 inch Simple Stories Sn@p album/binder so I decided to use that for my December Daily album. I love how these albums come with everything you need to complete an album - cardstock inner pages, pocket page protectors, plus chipboard dividers. I purchased extra pocket page protectors for my album too as I have a LOT I want to add to it. The beauty of December Daily is that you can make your album any size you like, and include as much or as little as you like. There doesn't have to be any hard and fast rules so don't be afraid to make it your own. It's completely up to you :)
Many scrapbooking kit companies have released December Daily kits this year for you to buy. Some include Project Life cards in them (and even an album plus pocket page protectors in some cases too). They are an awesome idea if you want something that is themed, hassle-free, and easy to put together. Scrapbooking companies such as Simple Stories, Echo Park, My Mind’s Eye, Carta Bella, Basic Grey, Studio Calico, etc. have released Christmas scrapbooking lines that are perfect for Project-Life-style December Daily albums too! Have a browse online and see what you can find if you think that is an option you'd like to explore.
When I make Project Life pages in my 12x12 inch album, I usually put my own kit together from my stash based on a set colour scheme that I may have in mind for my spread. If I need to, I will then buy anything that I don’t already have which I need or particularly want to use to fill in the gaps to put my page together. I find that doing things this way helps me to use what I already have, create spreads faster, and cut down on the amount of money that I spend on supplies. This system works really well for me so I have used it to put together my own kit to create my December Daily album from too.
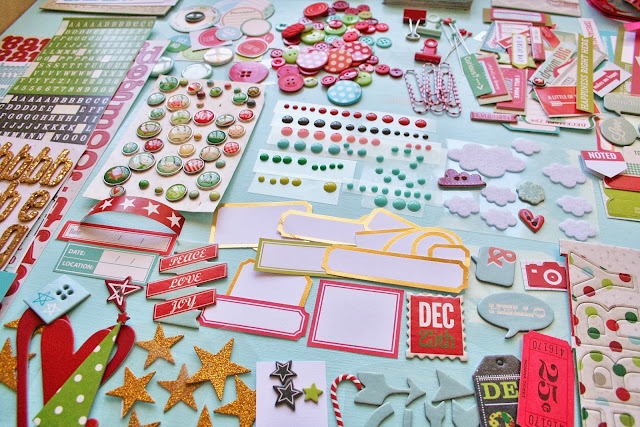
As you can see from the picture of my self-made kit above, the main colour scheme that I am using for my album is aqua blue, red, lime green, pink, chalkboard/black, white, and gold. I use this colour scheme when decorating my home for Christmas each year, so it was a natural choice for me. If you are stuck on working out what products you want to use for your December Daily, I suggest choosing a colour scheme first.
After choosing my colour scheme, I went through my supplies and pulled out all of the papers and embellishments I had that were in keeping with my colour scheme for my December Daily album. The embellishments I pulled out are those which I use a lot in my Project Life scrapbooking - patterned papers, sequins, ribbons, trims, buttons, enamel dots, paper clips, decorative pins, digital printables, tags, stickers, chipboard, alphabets, and little word stickers. I know there is a LOT of stuff in my kit, but I have done this because I find that if I have more options at hand when I am putting my spreads together, the less time I waste rifling through the rest of my supplies and my pages come together a lot more quickly and easily.
Try this method out for yourself, too. Go through your stash before you purchase anything and see what you have in the colours you want to use for your album. Not everything has to be Christmas-themed, either. You might be surprised at just how much you already have that you can use in your December Daily :) If you want to, you can also throw in some stamps, paint, ink, mist...whatever you want. Of course, you can add as little or as much to your own kit as you like. I do my Project Life pages using an embellished, scrapbooking style, but if you prefer a simpler Project Life style, your kit won't need to be as full as mine.
Next, as I didn't have any Christmas-themed products in my stash apart from some brads and a few tags, I purchased some papers, embellishments, and alphas from the Simple Stories December Documented line and some of the Simple Stories Sn@p Christmas Project-Life-style 6x4 and 3x4 cards. When I had everything I wanted, I corralled all of my bits and pieces in some things I already had - a box, basket, bowl, and some little glassine envelopes and plastic bags (sorted according to type of embellishment). I put everything (including the alphabets and my filler & journaling cards) in a drawer housed in a rolling drawer unit which sits next to my desk in my studio, with my 12x12 papers on top of the unit in a 12x12 resealable plastic bag. This enables me to pull everything out and tidy it up quickly and easily whenever I need or want to. It might sound like a bit of work to set it all up like this, but it really doesn't take long at all, and it's a great way to keep all of your bits and pieces for your album in the one place.
Try doing this yourself with all of the things you have pulled out for your own kit. Put them all together in the one spot, handy to your work area, so you can grab them and work on your album whenever you like. It doesn't have to be fancy - go with whatever works for you. It's a big help to my creative process when I do this, and it may just help you, too.
Thank you so much for reading along today. It's been a pleasure to be able to share some of my December Daily album process with you and I hope that you have gathered some ideas that will help you along as you work on your own December Daily. Next post I'll share some ideas for topics you may like to journal about or photograph to include in your album. See you soon :)


Great article Karen! I've done my stash and now I'm off to read Part 2. BTW - I love the colour of your desk!
ReplyDeleteGreat post Karen, I love seeing how other people approach their DD. Off to read Part 2...
ReplyDeleteKaren, thank you so much for sharing your ideas. I have been looking forward to your post about the DD. This year is my first time making one and your thoughts really help.
ReplyDeleteThis is an awesome post! Thanks so much for sharing. I always make a Daily December album for myself as well, however this year I am making one for each of my close girlfriends in kit form .....Your post has really helped me. Thank you thank you.
ReplyDeleteThank you for this great post! Can you believe I just gave one of those Snap albums away? I have another though, I will have to exchange it for red...lol this is also my first year with making a DD and doing any PL, so this is going to be fun! On my way over to part two....:)
ReplyDeleteWonderful posting, so very helpful in getting ready to make the DD. I'm going to do exactly what you've outlined, makes so much sense...THANKS!!!
ReplyDeleteOk, I've got my SNAP album, the red chevron burlap one. I also have the december documented kit and the snap 4 x 6 and 3 x4 and the snap bags. I also have a misc me and the bo bunny kit, elf on the shelf stuff, all of it, from after Christmas sales. last year I did one 12 x 12 binder using heidi swapp Believe with 60 page protectors. So I'm really sizing down. I have a HUGE family. I'm using your suggestions I have all must stuff gathered and in a box.
ReplyDeleteYou are awesome! This is so helpful! Off to read the next instalment! Love reading your facebook posts as well (I am Jane Notmyname)
ReplyDelete