
Many people dedicate one Project Life layout/spread to each week of the year. I decided to organize my album into months, and to scrap my layouts based around the major events that took place during that month. More on that in another post ;D The best thing about Project Life, in my opinion, is that you can make your layouts and album suit your own style and time constraints. There are no rules. How awesome is that?!

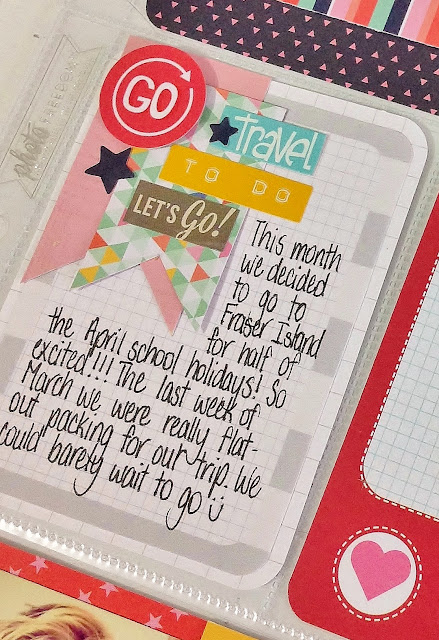
Anyway, sometimes in a month I'll have a bunch of significant things that happened and I may only have one photo for each event (or no photos), so in that instance I'll combine all of these things into the one Project Life layout. That's exactly what I did with my latest layout (pictured above). With the lack of photos for this layout, I focused instead on getting those stories down and making it all look cohesive. There is a lot of journaling, and that's totally okay - I was still able to document the important things in our life for us to reflect back on in the future, and that (for me) is what Project Life is all about.
I usually start my layouts by gathering my photos. I then look for colours in the photos that I can match to papers, 3x4" and 6x4" journaling and filler cards, and embellishments in my stash (I tend to not use products from the one product line or manufacturer on my layouts - I mix and match from many different ones). I will then go through my stash and pull out bits and pieces in the same colours to form my own kit, of sorts. Finally I start assembling my cards and adding the photos and journaling.

I must confess that this layout had me stumped for a while because I don't typically use pink and pale yellow on my layouts. My partner, David, had a tooth out in March. It was a big thing for us because he was in a lot of pain for the month. I didn't want to put a photo of David with a swollen face and looking miserable in our album, so instead I found a diagram on a medical website online that showed the problem he had. I studied biology and nursing at university, so I am naturally drawn to scientific diagrams. It turned out great because it's an easy way to explain to the kids what was wrong with David (he's all better now). As it turned out, the colours in the diagram actually formed the jumping off point for me to go ahead and choose the colours for the rest of the layout. Here's some close-ups of the details of the rest of the 6x4 and 3x4 cards on the layout...


The gold glitter Thickers from the Maggie Holmes line by Crate Paper were perfect to journal about us having to look after a cat named "Goldie" during March, especially because I didn't have a photo of Goldie. I echoed them on two of the other 6x4 cards so that the layout would flow nicely. Other than that I used the following on this layout - Dear Lizzy Lucky Charm papers and die-cuts, Simple Stories Urban Traveller red alphas, Becky Higgins Project Life grid journaling cards, a My Mind's Eye memo card from the Noteable collection, a journaling card and yellow typeset letter stickers from the Sn@p line by Simple Stories, some Studio Calico printable journaling cards and embellishments, Pebbles Seen & Noted dymo-style word stickers, Studio Calico stickers and chipboard arrows (from the Sundrifter, Here & There, Snippets, and Atlantic lines), Studio Calico Atlantic vellum anchor die-cut, Glitz Designs Unchartered Waters yellow anchor paper, Simple Stories Urban Traveller and 24/7 word stickers, an old Heidi Swap chipboard star that I painted white, an old KI Memories Love Elsie word sticker and label sticker, an old KI Memories chipboard word, and some old sequins and buttons from my stash.


You'll notice in the main picture of this layout that I have a smaller 8x8 layout beside the main 12x12. I had only 2 photos from our Easter weekend so I decided to make a smaller layout to sit beside the larger one. I was really stumped for ideas for it until I came across a beautiful layout by Elizabeth Kartchner that featured some red striped paper and navy paper from her Dear Lizzy Lucky Charm line. I borrowed her paper choices and idea for a collection of embellishments at the top of the page, added a title using the gold glitter Thickers, and sprinkled around some embellishments, stamping and journaling and called it DONE. It turned out to be more like a traditional scrapbooking layout, actually. Remember how I said in my last post that those things really used to stress me out? Well, this one did just the same so I am not in a hurry to do another. I'm quite happy to stick to my little 6x4 and 3x4 Project Life cards in future - they are WAY less stressful!
Well, that's a very basic run-down of how I construct my Project Life layouts. No doubt you can work out how I have layered bits and pieces to get the effect I wanted so I have left that info out. If you have any questions though, please don't hesitate to ask.
Loving the gold glitter thickers and everything about your pages Karen - I always like to see how you sprinkle sequins & buttons & small embellies - I really do have to stop overthinking my layouts - thanks for the inspiration :)
ReplyDeleteThank you Leanne, and it's my pleasure - I'm so happy that you feel inspired by my layouts :) I tend to overthink my layouts sometimes too! xx
ReplyDeleteis that your handwriting? Wow, so neat and pretty!!
ReplyDelete