In starting my December Daily album, I chose not to decorate my album cover first up. When completing projects like this in the past, I have found that sometimes I can get too hung up on how I want the cover to look, and I have found it much easier to put it together later, so I will leave decorating the front cover of my album (and completing my title page and foreword) until I have finished putting the rest of it together. It's much less stressful for me that way :)
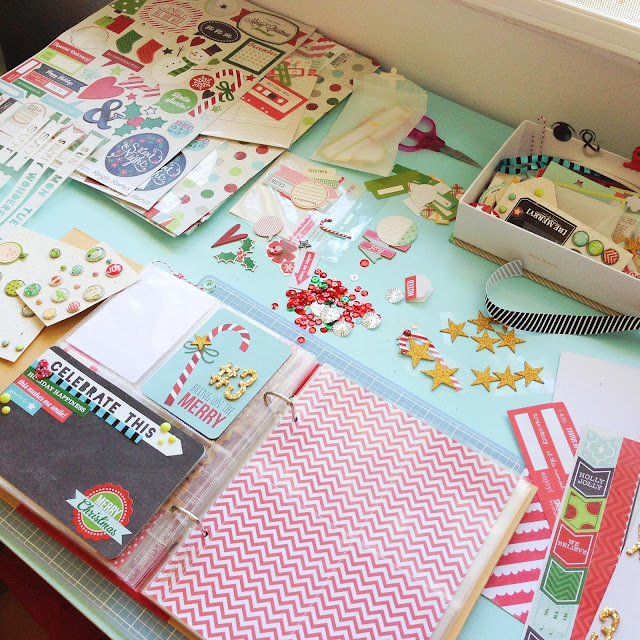
The photo above is an example of how I typically start putting together a spread in my album. This spread will be all about our favourite Christmas movies (left-hand side) and story-books (right-hand side). I start by choosing cards which will suit the theme of the photos that are to go in each spread, and if I don't have any cards that are exactly what I am after, I'll slip a piece of coloured paper in the pocket instead for the time being. Later I will come back and use that piece to create my own card for the pocket it occupies. I slip pieces of paper or cardstock in the pockets that are to hold photos and write a note on them regarding what photo I want to include. This makes it a lot easier to go back and finish off the spreads later on. I go ahead and do this for each spread in the album before I embellish anything at all. If you don't already do this, go ahead and give it a go. You might find it helps you too.
Generally I will complete one spread in my album at a time, layering embellishments on my cards and inserts before sticking anything down, before I move on to the next spread. I also adopt this same process in completing my Project Life spreads in my regular 12x12 Project Life album. The photo below is an example of how I do this.
Generally I will complete one spread in my album at a time, layering embellishments on my cards and inserts before sticking anything down, before I move on to the next spread. I also adopt this same process in completing my Project Life spreads in my regular 12x12 Project Life album. The photo below is an example of how I do this.
I love to embellish standard, pre-made filler and journaling cards. I don't scrapbook in 12x12 or 11.5x8 size anymore, so Project Life is the only form of memory keeping that I do now so I embellish my spreads just as I would a normal scrapbooking layout. Below is an example of how I embellish my cards. The card on the left is a plain Simple Stories December Documented 3x4 inch filler card. You can see in the card on the right how I rounded the corners, added an old piece of ribbon from my stash, a die-cut arrow, and a star sticker to it to make it look completely different. I love it :)
Below is an example of a 4x6 inch journaling card that I have made myself from scratch using a piece of tone-on-tone green patterned paper from the Simple Stories December Documented line as a base. Again I rounded the corners before layering some stickers, ribbons, a digital printable, a chipboard holly embellishment and some enamel dots to create a unique card that's ready for journaling to be added later on. I always hand-write my journaling so if you chose to type yours or print it out using a computer, you'll need to add the journaling before you stick any of your embellishments down.
Below is a filler card that I made using a piece of chalkboard-look patterned paper (also from the Simple Stories December Documented line) and a mixture of letters from different alphabet sets. If my alphas don't match my colour scheme (as was the case with the large ampersand on this card), I won't hesitate to paint or ink them with colour to them to make them work. They key to making this look work is to mix alphas of different sizes, shapes, and dimension (mix stickers with chipboards). It gives the card texture and I really love the quirkiness this look adds to my spreads.
The first spread proper in my December Daily (above) will document our Christmas tree. We always put it up and decorate it on December 1st so it was only natural that I make it the first of our Christmas traditions to document in the album. Again, photos and journaling will be added in later.
The spread in the photos above will document how we decorate our house for Christmas. I made a few extra 4x6 inserts to go between two 6x8 pages in my album. I like how it adds a little more room for a title, some journaling, or photos without having to add a full extra page or two to the album. In this case, I cut some old printed transparency that I had and added the spread's title to it. Love this look!
Music is an important part of Christmas in our house. The pages above will document all of our favourite Christmas tunes. My children also learn to play Christmas songs on the recorder every year so I couldn't not include something in my December Daily about that. My daughter also plays violin at school and every December the school orchestra and band hold a concert. The red "MERRY" die-cut card is actually a flip-up card that I made myself which will hold a photo of her playing in the orchestra and some journaling about what Christmas music means to us as a family.
All four of us in our household are prolific list-makers, and with all that there is to do at Christmas, we always have a stack of lists to write. The December Daily spread pictured above will document that. I've included another 4x6 insert here between the two full-sized pages to hold the title of the spread, and a pocket to hold our many lists we all write - my December Daily traditions to document list, the kids' wish lists, shopping lists, lists of things to make, lists of things to do around the house, lists places to go and thing to take to each place on Christmas day...it's endless in this house, I tell you! We'd be lost without our lists :)


